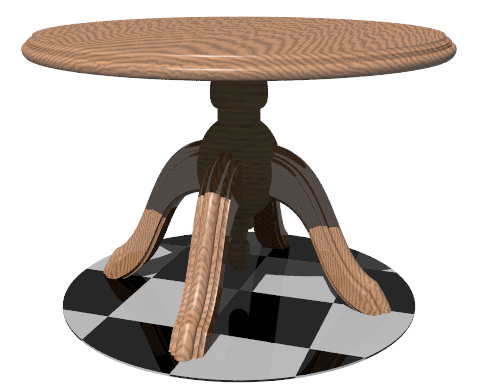
In this first part of the tutorial we will create a table that combines lathe and prism objects and learn how to add additional povray code from inkscape using the extension “svg2pov Extra properties”
Step 1: Top of the table

Create the profile of the top of the table ensuring that the interior vertices are in the coordinate x=0 to avoid hole in the center.
Step 2: Add export properties to inkscape path
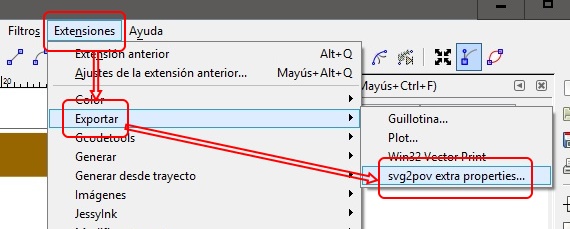
With the path we’ve created selected go to
Extensions\Export\svg2pov extra properties… to assign as lathe type, povray generates a object by rotating this profile about his Y axis.
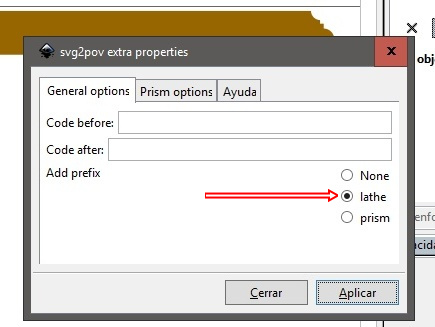
In the dialog box that appears when you select that option press the radio button
lathe, this option adds to the id of the selected path the prefix
lathe_ to tell the script that is the type of object to be created in the exported .pov file.
Step 3: Export and render first test
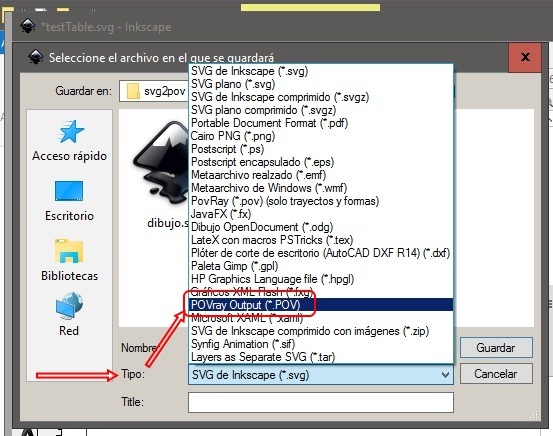
Export to povray file to check the result. From the menu
File\Save As… select
Type POVray Output (*.POV) .
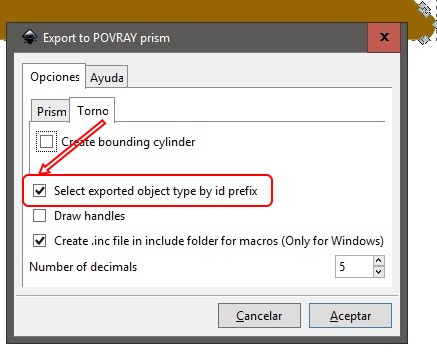
In the dialog box that appears select the option
Select object type exported by id prefix and press
OK to start the export process.
Upon completion of the process in the same directory on your file .svg will have a .pov file with the chosen name, open it from povray and we launched a first render test, the result is as follows:

The export script creates a camera located at coordinates that allow all objects appear in the render and a light.
Step 4: Central Leg Table
From inkscape we create another path for the central leg of the table from which the other four legs, follow the same guidelines as for the top:
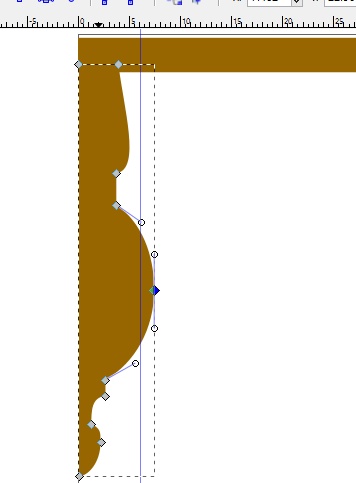
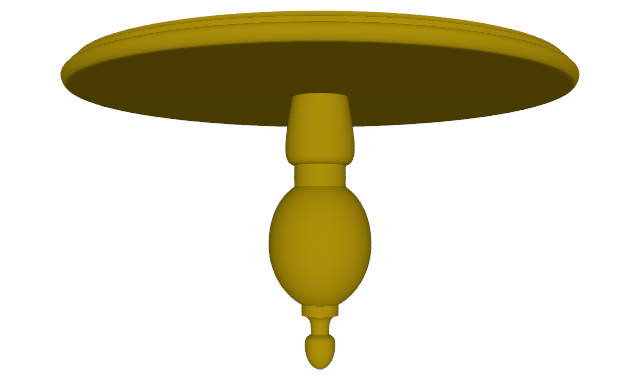
We follow the instructions in steps two for assign the export options to this path and step three to export and do a test render. The result:
Step 5: Legs

From inkscape create the path to be used for all four legs emerging from the center leg, in this case it is not necessary that the interior points are at coordinate x=0 because the object to be exported is a prism.
With this path selected go to
Extensions\Export\svg2pov additional properties… to assign as prism type and add additional pov code before and after the exported code, we will use the text fields
Code before and
Code after.

In the field before write this pov code:
#local leg=object {
With this code we assign the exported object to the variable
leg for later use in a loop
for and create the four legs.
And in the field after:
rotate -x*90}\n#for (i,0,4) object{leg rotate y*(i*90)} #end
With this code we rotate the the exported object in te x plane since the prism objects are created in the Y plane and close the block object created in the field before. Then we use a loop that rotates the leg object 4 times on the plane Y.
Note: text fields in the inkscape extensions only allow one line, if we need more text lines in the code will include the characters
\n
.
In the
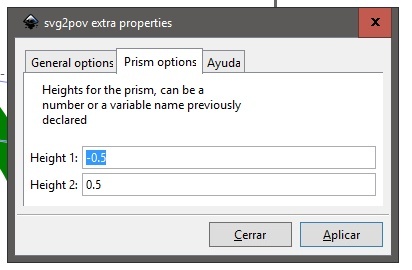
Prism options tab set the values -0.5 and 0.5 in the fields Height 1 and 2 to give a total thickness of 1 to the prism.
Follow the instructions from step three and export and launch a test render. The result:

In the next part of this tutorial we assign textures and give more detail to the legs.
 In this first part of the tutorial we will create a table that combines lathe and prism objects and learn how to add additional povray code from inkscape using the extension “svg2pov Extra properties”
 Create the profile of the top of the table ensuring that the interior vertices are in the coordinate x=0 to avoid hole in the center.

 In the dialog box that appears when you select that option press the radio button lathe, this option adds to the id of the selected path the prefix lathe_ to tell the script that is the type of object to be created in the exported .pov file.
 Export to povray file to check the result. From the menu File\Save As… select Type POVray Output (*.POV) .
 In the dialog box that appears select the option Select object type exported by id prefix and press OK to start the export process.
Upon completion of the process in the same directory on your file .svg will have a .pov file with the chosen name, open it from povray and we launched a first render test, the result is as follows:
  The export script creates a camera located at coordinates that allow all objects appear in the render and a light.
 We follow the instructions in steps two for assign the export options to this path and step three to export and do a test render. The result:
 From inkscape create the path to be used for all four legs emerging from the center leg, in this case it is not necessary that the interior points are at coordinate x=0 because the object to be exported is a prism.
With this path selected go to Extensions\Export\svg2pov additional properties… to assign as prism type and add additional pov code before and after the exported code, we will use the text fields Code before and Code after.
 In the field before write this pov code:
 Follow the instructions from step three and export and launch a test render. The result:
 In the next part of this tutorial we assign textures and give more detail to the legs.